


8 Best Drills for Back Handsprings That Build Confidence
A back handspring is not won by throwing yourself backward and hoping your hands find the floor. It is built through a confident sit, a powerful jump, open shoulders, a tight body shape, and hundreds of smart repetitions. The best drills for back handsprings help athletes understand those pieces one at a time, so the skill feels earned instead of scary.
For parents, the goal is not to rush to a standing back handspring. The goal is to help your athlete build a foundation that protects their body, strengthens their confidence, and gives them a skill they can repeat with good form. A qualified coach, proper mats, and appropriate progressions make a huge difference, especially when an athlete is first learning to go backward.
Start With the Shapes That Make a Back Handspring Work
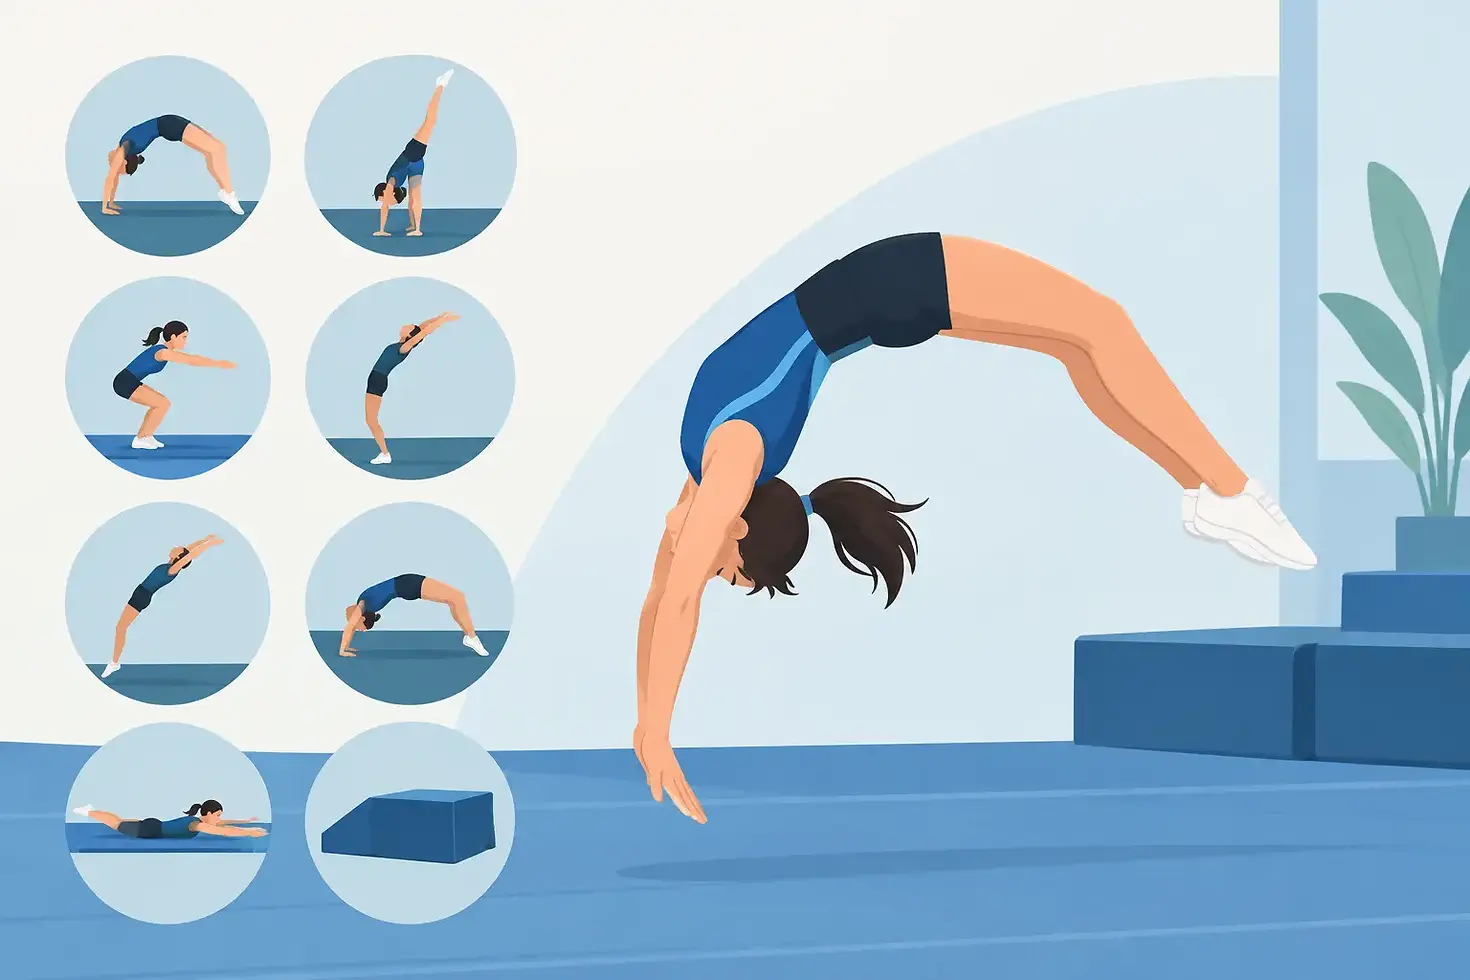
Before athletes work on the full skill, they need to recognize the positions their body will move through. A back handspring begins in a controlled sitting position, passes through a long hollow shape as the hands reach back, and finishes in a tight body position ready to stand tall or connect another skill.
The sit-and-reach drill
Stand with feet about hip-width apart, arms by the ears, chest lifted, and eyes forward. Sit back as though reaching for a chair, keeping the knees over the toes rather than letting them collapse inward. From the sit, swing the arms back and then quickly reach them up by the ears.
This may look simple, but it teaches one of the most common corrections in tumbling: athletes should sit back before they jump back. When athletes bend forward at the waist or drop their chest, they often lose the power and direction needed for a safe back handspring. Practice the sit-and-reach drill slowly at first, then add a quick arm swing and jump straight up.
The hollow hold and hollow rocks
A tight hollow body keeps the middle of the back handspring connected. Have the athlete lie on their back with arms squeezed by their ears, legs straight, and ribs pulled in. Their lower back should press gently into the floor. Once that position is solid, small controlled rocks can build endurance.
Avoid making this drill a competition to see who can hold the longest. Good shape matters more than a long hold with bent knees, loose arms, or an arched back. Short, clean sets are more useful than fatigued repetitions.
Handstand shape holds
A back handspring must pass through the hands with strong, open shoulders. Handstand holds against a wall, with coaching on shoulder position and body tension, help athletes learn to support their weight upside down. For newer athletes, a coach may begin with assisted handstand shapes on soft equipment.
The goal is not just getting upside down. Athletes should push tall through their shoulders, keep their arms straight, and squeeze their core. A soft shoulder angle can make a back handspring feel heavy and slow, while an open shoulder position helps the athlete block off the floor.
8 Best Drills for Back Handsprings, In Progression
The right drill depends on what an athlete needs most. Some athletes are fearless but need better body control. Others have beautiful shapes but need time to trust the backward motion. A coach should choose drills based on readiness, not simply because a teammate has moved ahead.
1. Jump-back to a raised mat
With a coach present and appropriate elevated mats, athletes sit, jump backward, and land on their upper back in a tight hollow shape. This teaches them that the back handspring travels backward from the legs, not downward from the shoulders.
The athlete should drive through the legs and keep the arms close to the ears. If they look for the mat behind them or throw their head back, reset the shape before adding speed.
2. Backward roll to a stand
A smooth backward roll helps athletes become comfortable moving backward while keeping their hands active near the ears. It also reinforces the idea that hands should reach back quickly, not hang at the sides.
This drill is a helpful starting point for athletes who hesitate when asked to go backward. It is not a substitute for a back handspring, but it can reduce fear while reinforcing safe movement awareness.
3. Handstand snap-down
From a supported handstand or a coach-approved handstand setup, the athlete snaps their legs down quickly to a controlled landing with arms up. This develops the fast leg action needed after the hands contact the floor.
Focus on landing with the chest lifted and knees soft. If the athlete lands low, steps forward repeatedly, or lets their arms fall, they may need more core and shoulder-shape work before progressing.
4. Rebound jumps
A back handspring is a jumping skill. Rebound jumps teach athletes to use their ankles, knees, and hips together while maintaining a tall, tight body. Start with small straight jumps, landing quietly with arms by the ears, then progress to connected rebounds.
This is especially useful for athletes who can complete a back handspring but land heavy or struggle to connect it in a tumbling pass. A strong rebound creates rhythm for round-off back handsprings and higher-level skills later on.
5. Bridge kickovers with shoulder focus
Bridge work can build shoulder flexibility and body awareness, but it should be used carefully. Athletes should never force a bridge or push through wrist, back, or shoulder pain. In a good bridge, the shoulders open and the weight stays active through the hands.
A bridge kickover can help an athlete understand the reaching action of going backward. Still, a bridge is more arched than the hollow shape used in a back handspring. Coaches use this drill as one piece of preparation, not as the final model for the skill.
6. Spotted back handsprings on proper mats
A trained coach can provide safe, gradual assistance while the athlete practices the actual pathway of the skill. Spotting is not just catching an athlete. Done correctly, it gives feedback about timing, shape, jump direction, and where the athlete needs more support.
Athletes should not ask friends, siblings, or untrained adults to spot them. Back handsprings place real force through the wrists, shoulders, and back, and incorrect assistance can increase risk for both the athlete and the person attempting to help.
7. Back handspring over a barrel or wedge
Specialty equipment such as a tumbling barrel or wedge mat can make the backward pathway feel more approachable. The raised surface gives athletes a clear target for their hands and helps them experience the motion with less fear.
This progression works best when the athlete can already sit back, jump with commitment, and hold a strong handstand shape. Equipment can support learning, but it cannot replace the strength and technique behind the movement.
8. Round-off rebound to back handspring timing
For athletes preparing for a round-off back handspring, timing drills connect the end of the round-off to the sit-and-jump action. A controlled round-off rebound, followed by a quick sit with arms up, teaches the athlete not to pause or bend forward after landing.
This drill should come later in progression. A standing back handspring does not have to be perfect before every athlete begins round-off timing work, but they do need consistent shapes, safe landing mechanics, and coach approval.
What Parents Should Watch For
Progress is rarely a straight line. An athlete may have a confident practice one day and feel nervous the next, particularly after a growth spurt, a break from training, or a small mental block. Encouragement works best when it recognizes effort and technique rather than demanding the skill on a deadline.
Watch for pain, repeated fear, or form that falls apart as the athlete gets tired. Wrist discomfort, shoulder pain, and low-back pain are signals to pause and speak with a coach or qualified health professional. More repetitions are not always the answer. Sometimes the next best step is flexibility work, stronger handstands, or a return to a drill that restores confidence.
At Cali Coast Elite, athletes progress through tumbling with structured coaching, appropriate equipment, and the kind of encouragement that helps them trust their training. The most exciting back handspring is not the first one thrown too soon. It is the one an athlete can perform with power, control, and a proud smile after putting in the work.


Comments